

Building a drone from scratch may sound intimidating, but with a bit of technical know-how and enthusiasm, it can be a fun and rewarding experience. In this article, we will take you through the process of building your drone step by step. And who knows, by the end of it, you might just become the next drone-building genius!
 |
 |
 |
 |
 |
 |
 |
 |
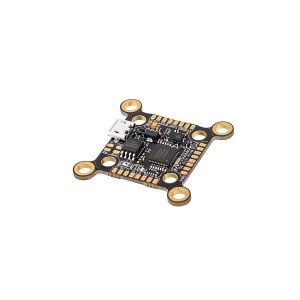
| Flight controller
|
Motors
|
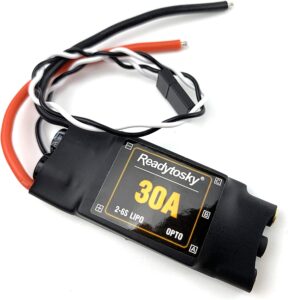
Electronic Speed Controllers | Battery
|
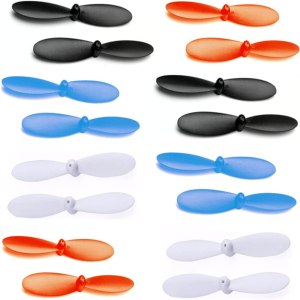
Propellers
|
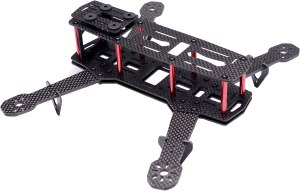
Frame
|
Radio transmitter and receiver
|
Power distribution board |
Before you build your drone, deciding on the type of drone you want to build is essential. For example, do you want a small drone that can fly indoors or a larger drone that can be used for aerial photography? Do you want a drone that can fly for a longer duration or a drone that can reach high altitudes? Once you have a clear idea of what you want, you can move on to the next step.
Once you have decided on the type of drone you want to build, it’s time to gather the necessary materials. Here’s a list of items that you will need to build a basic drone:

The frame is the backbone of the drone, and it’s essential to get it right. You can purchase a pre-built frame or build your own from scratch using carbon fiber or aluminum materials. If you create your frame, measure and cut the materials precisely, and use a strong adhesive to hold them together.

The next step is to install the motors and ESCs onto the frame. The motors should be attached to the arms of the frame using screws, and the ESCs should be mounted onto the frame using double-sided tape or zip ties. Finally, connect the motor wires to the corresponding ESCs, and the ESCs to the flight controller.

The flight controller is the drone’s brain, connecting all electronic components. First, the flight controller should be mounted onto the frame using double-sided tape or standoffs. Next, connect the ESCs, battery, and radio receiver to the flight controller.
The propellers make the drone fly, and choosing the right size and type for your drone is essential. The propellers should be attached to the motors using screws, and make sure to tighten them securely.

The battery powers the drone and should be connected to the power distribution board using thick wires. The power distribution board should be mounted onto the frame using double-sided tape or standoffs, and make sure to connect all the electronic components to it.

The radio transmitter is what you use to control the drone, and it should be connected to the radio receiver using a binding process. The radio receiver should be mounted onto the frame using double-sided tape or standoffs and connected to the flight controller.
Calibrating the drone is an important step that ensures it’s flying correctly. You can use a software program like Betaflight to calibrate the drone’s sensors, or you can do it manually by adjusting the trim tabs on the radio transmitter.
Before you take your drone for its first flight, check that all the components are securely fastened, and the batteries are fully charged. Start with a low altitude and gradually increase the height and speed as you become more comfortable. Make sure to fly in an open space away from people and buildings.
Building a drone from scratch may seem daunting, but it can be a fun and rewarding experience with the right mindset and approach. You can create a drone that meets your specific needs and preferences by following these steps. So gather your materials, and get ready to take to the skies!


2 Responses
I like to build a drone
There are links to each part you need in the article so just follow it step by step my friend and let me know how it turns out.